project finished
Press Fit Kits
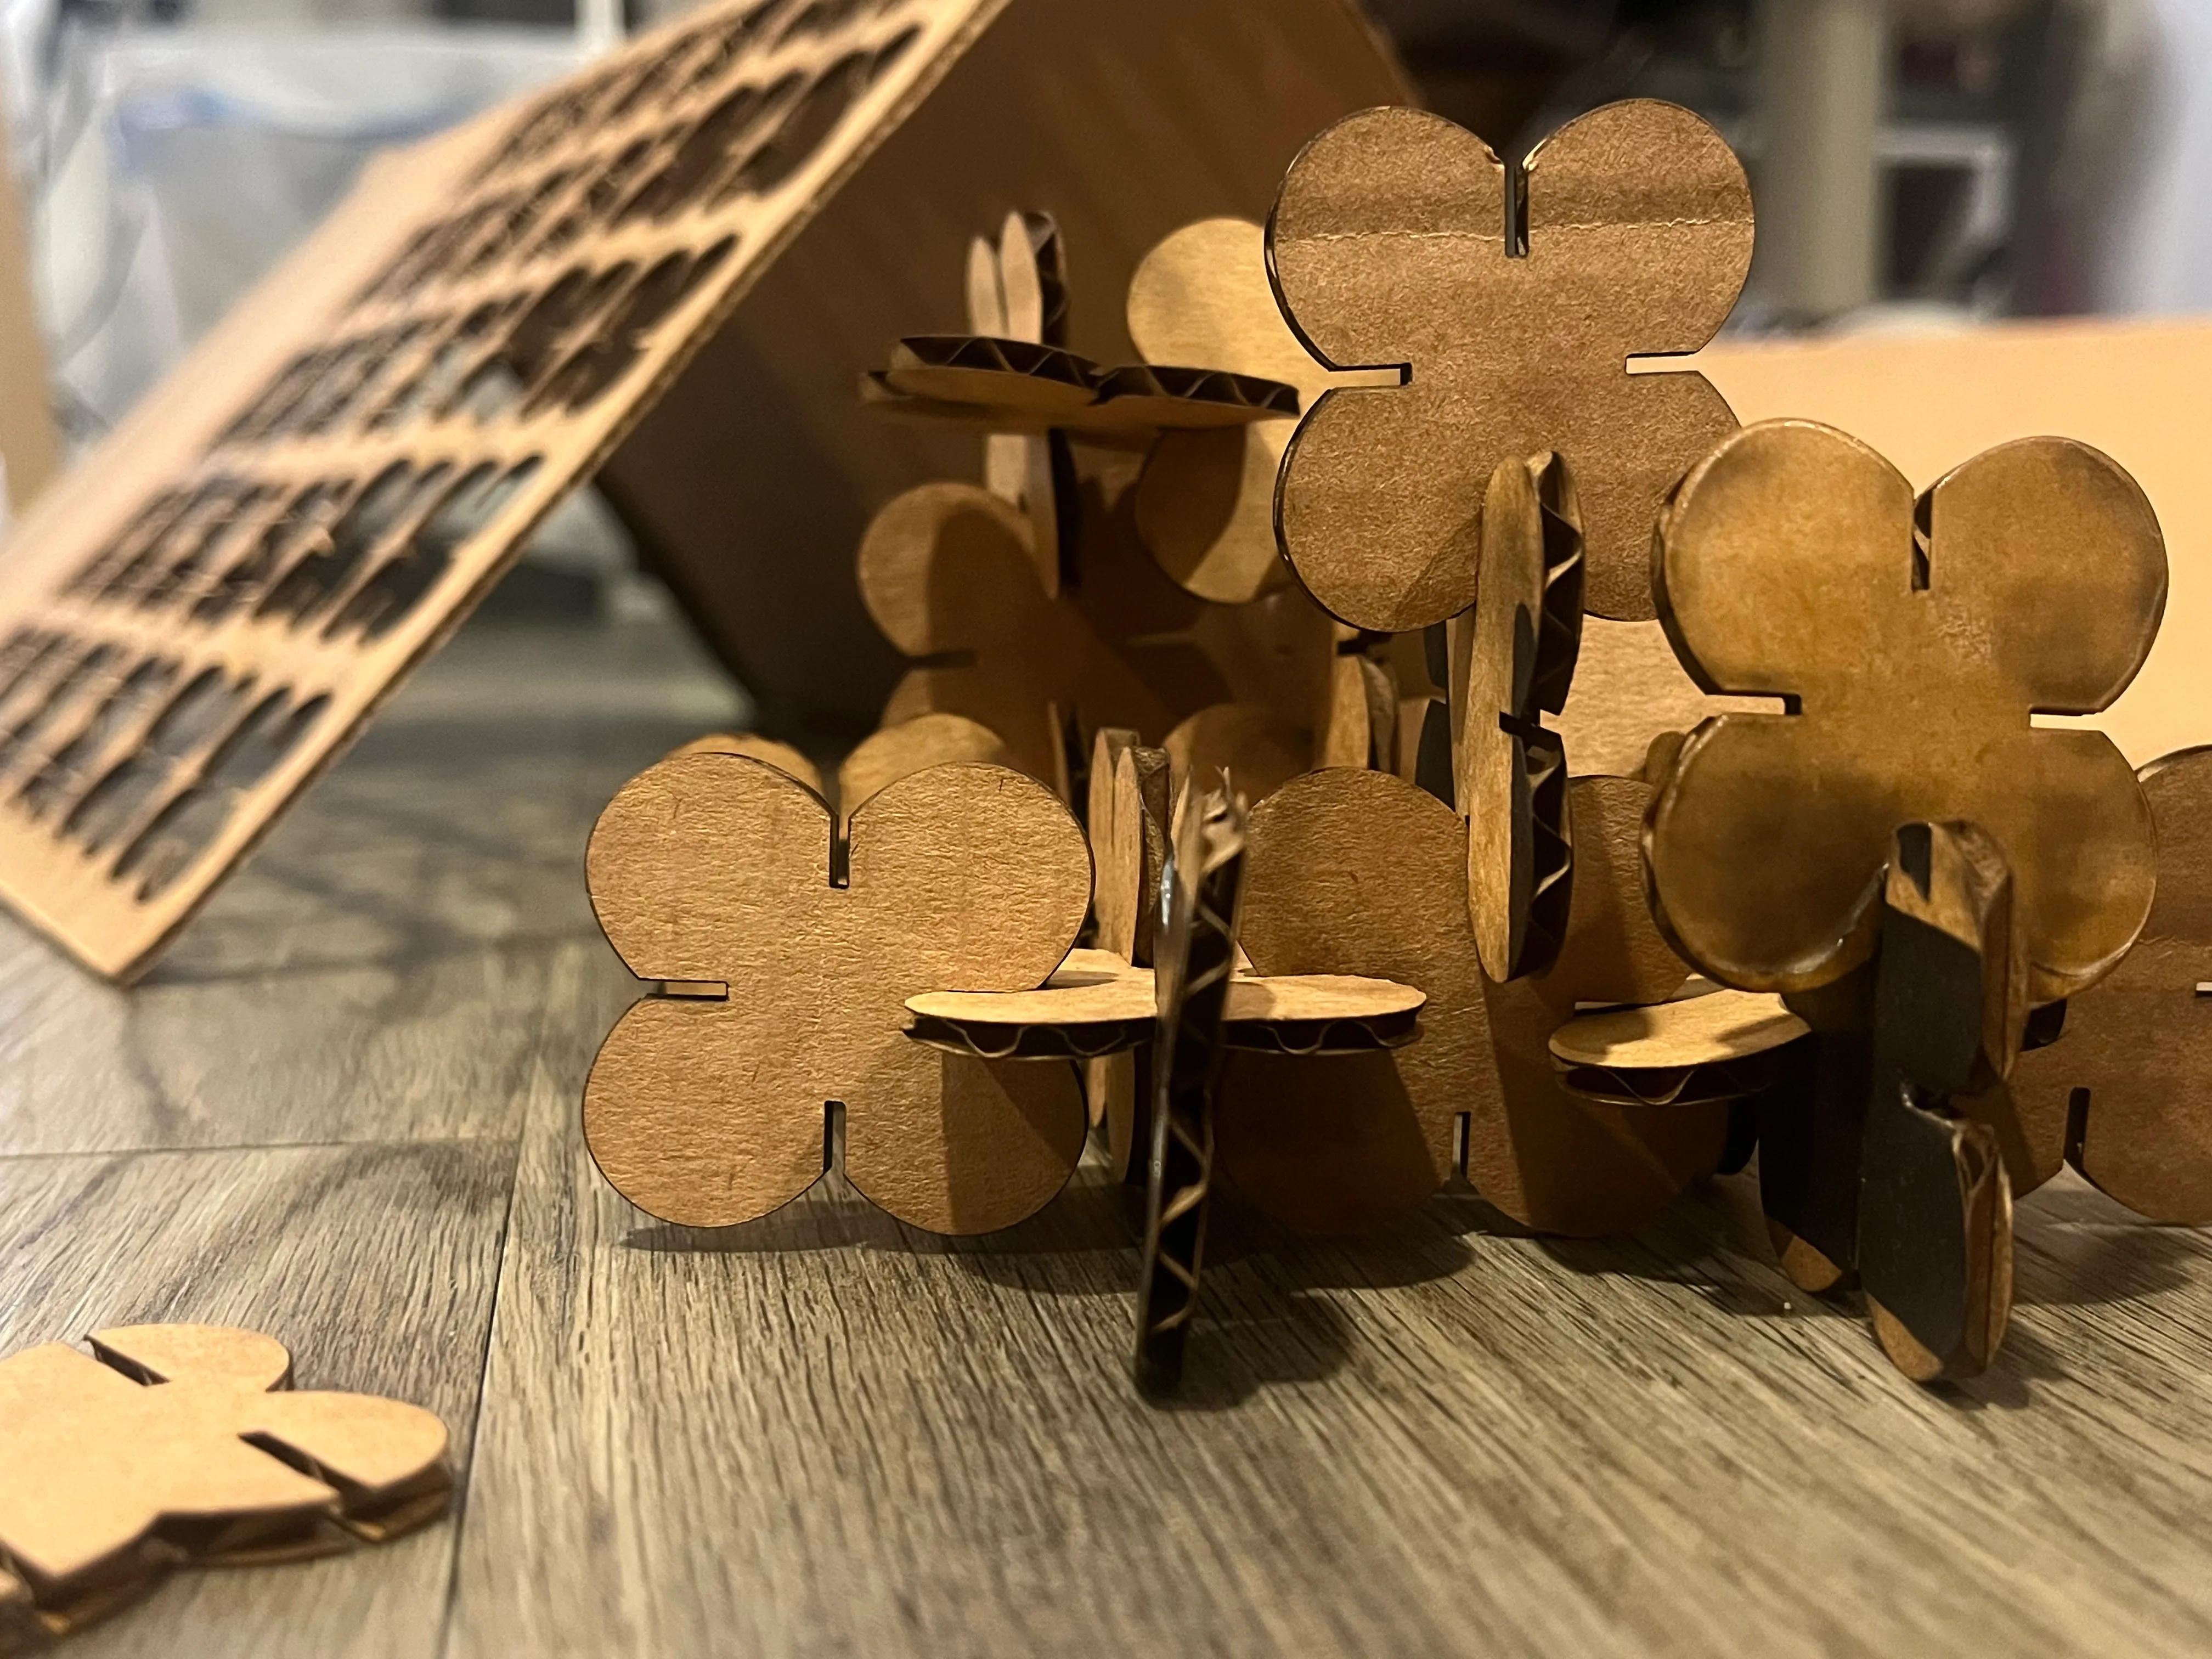
A laser-cut, press-fit kit of 30 interlocking cardboard pieces — my first time on the laser cutter and in Rhino.
Design
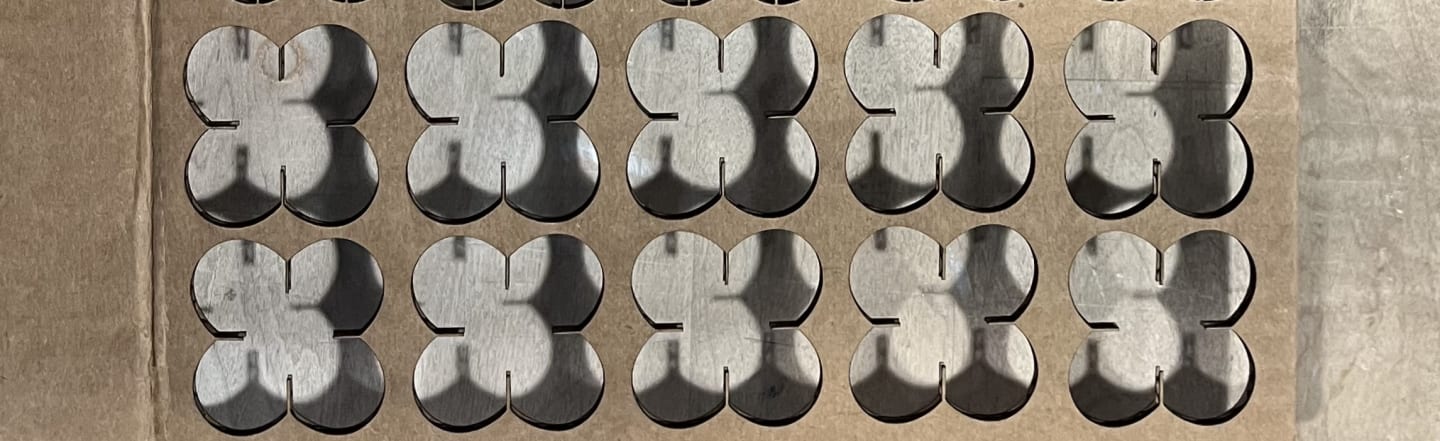
I had never done laser cutting or 3d modelling in rhino before, so I decided that I wanted to design something that was a simple shape, and something circular. I had multiple ideas I wanted to try, but decided to go with a butterfly-like shape.

Model
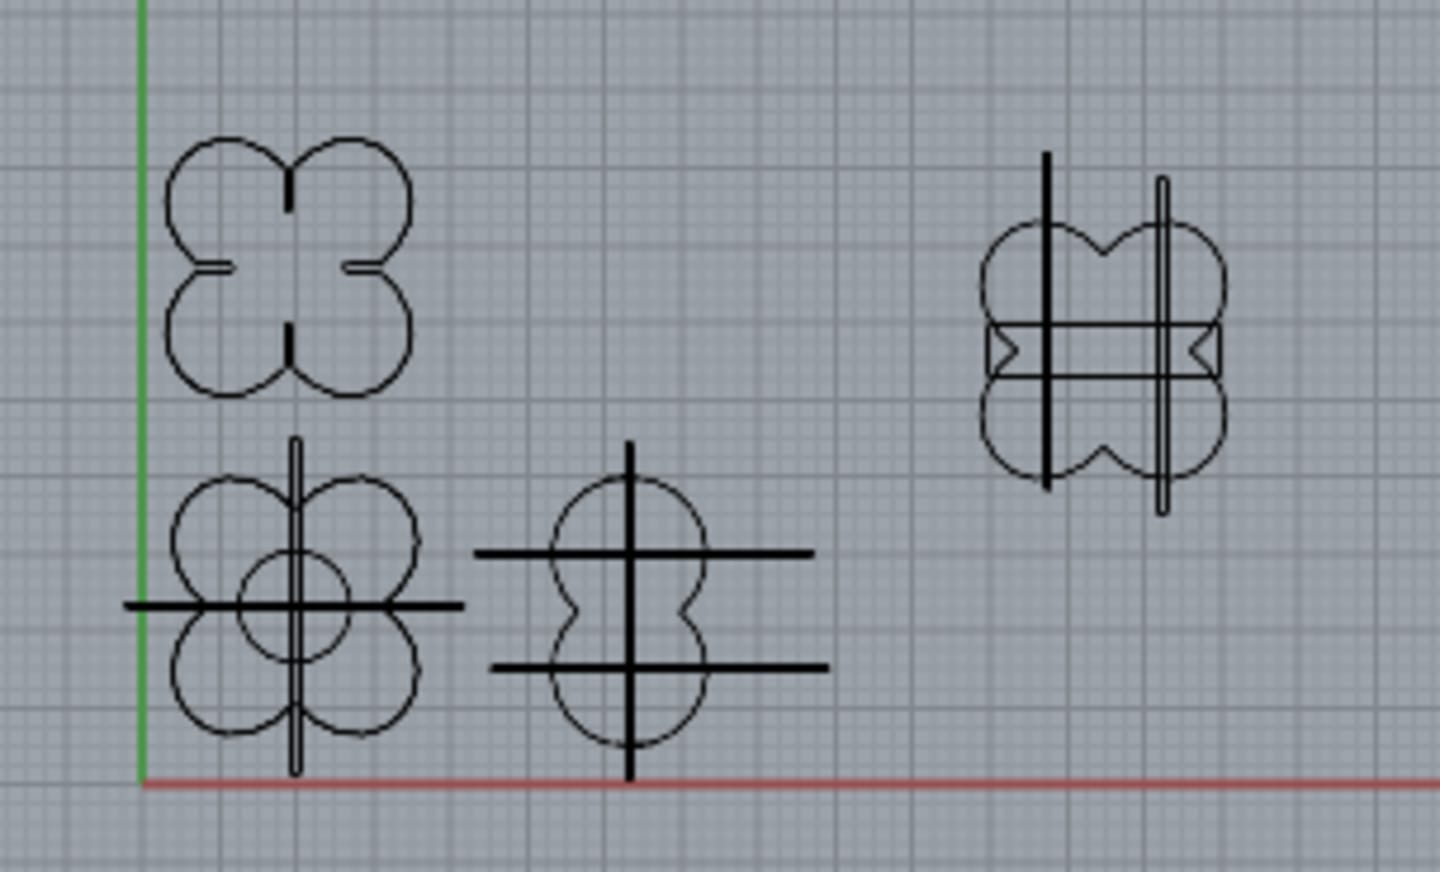
The model took a bit of time to make even though it was a very simple shape, because I decided to use Rhino. I figured I’d have to use it eventually, so a large part of this assignment was watching educational videos. I’m happy with what I’ve come up with, but I do want to figure out how to add chamfers to my designs. I looked up some beginner laser cutting tips, and found that the laser is a non-zero measurement, so I did remove 0.15 mm from the size of the cardboard.
Laser cutting
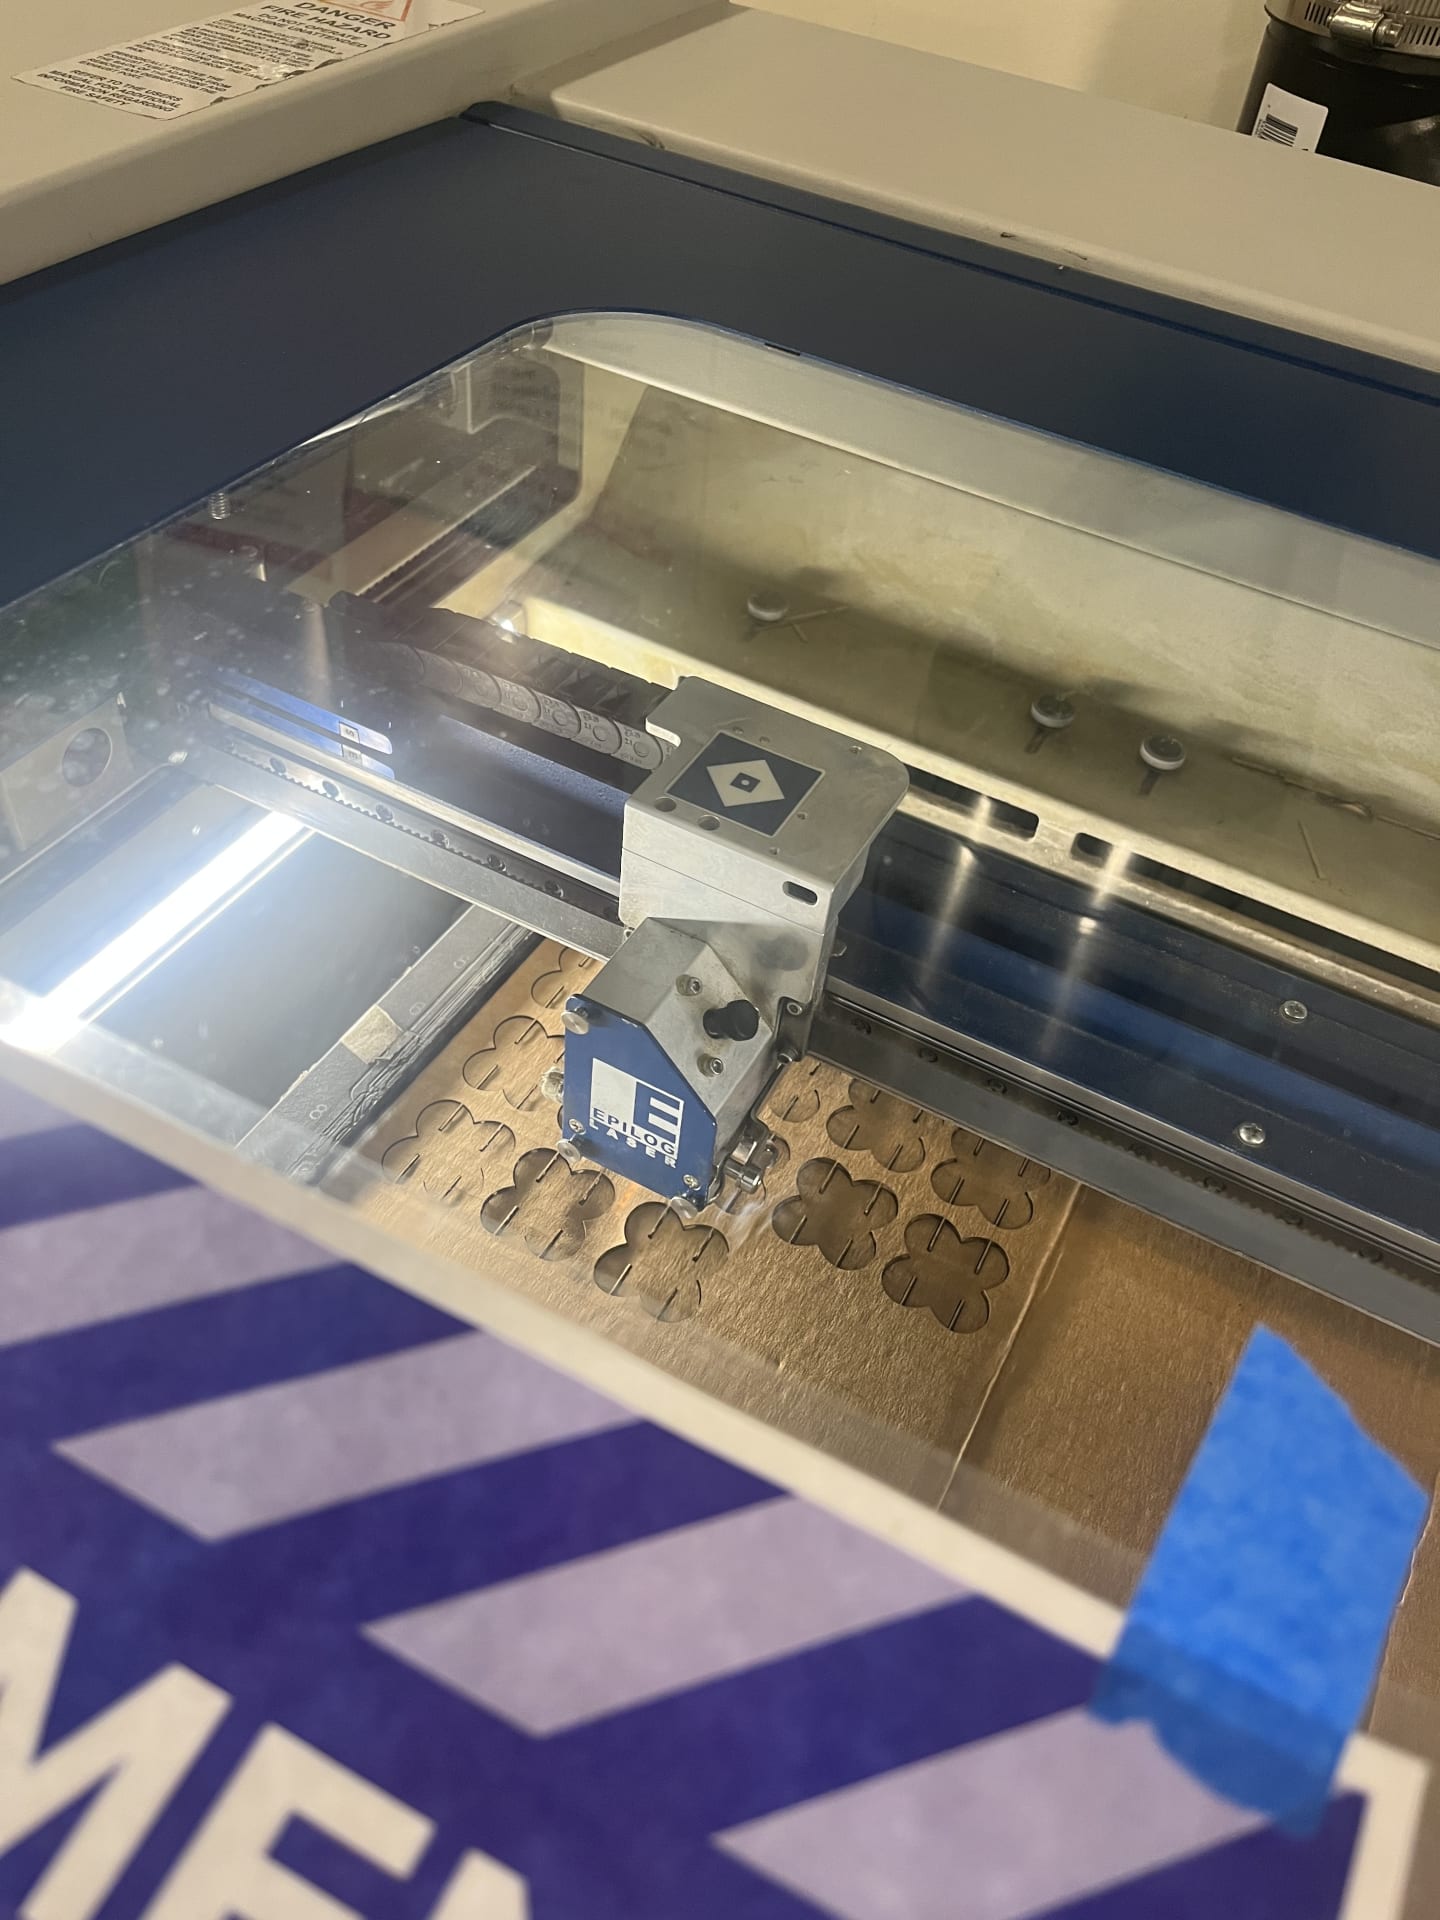
I found some old amazon boxes, and did my first laser cut at the mill. I decided to just go for it (which was not smart) and print all 30 of my pieces, and luckily the measurements matched up! I think accoutning for the size of the laser really paid off, and I’m glad that I did it. There were some things I did not expect though:
- Don’t cut small shapes on folded parts of the cardboard box. I had some shapes that were lasercut on the fold, and some of them split in half.
- Using thinner cardboard is easier, because it cuts through completely on the first try
Measurements:
- Cardboard: 2.5mm
- Shape size: 3x4"
- Slot size: 2.35mm
- Settings: P (50%) F(50%) S(20%)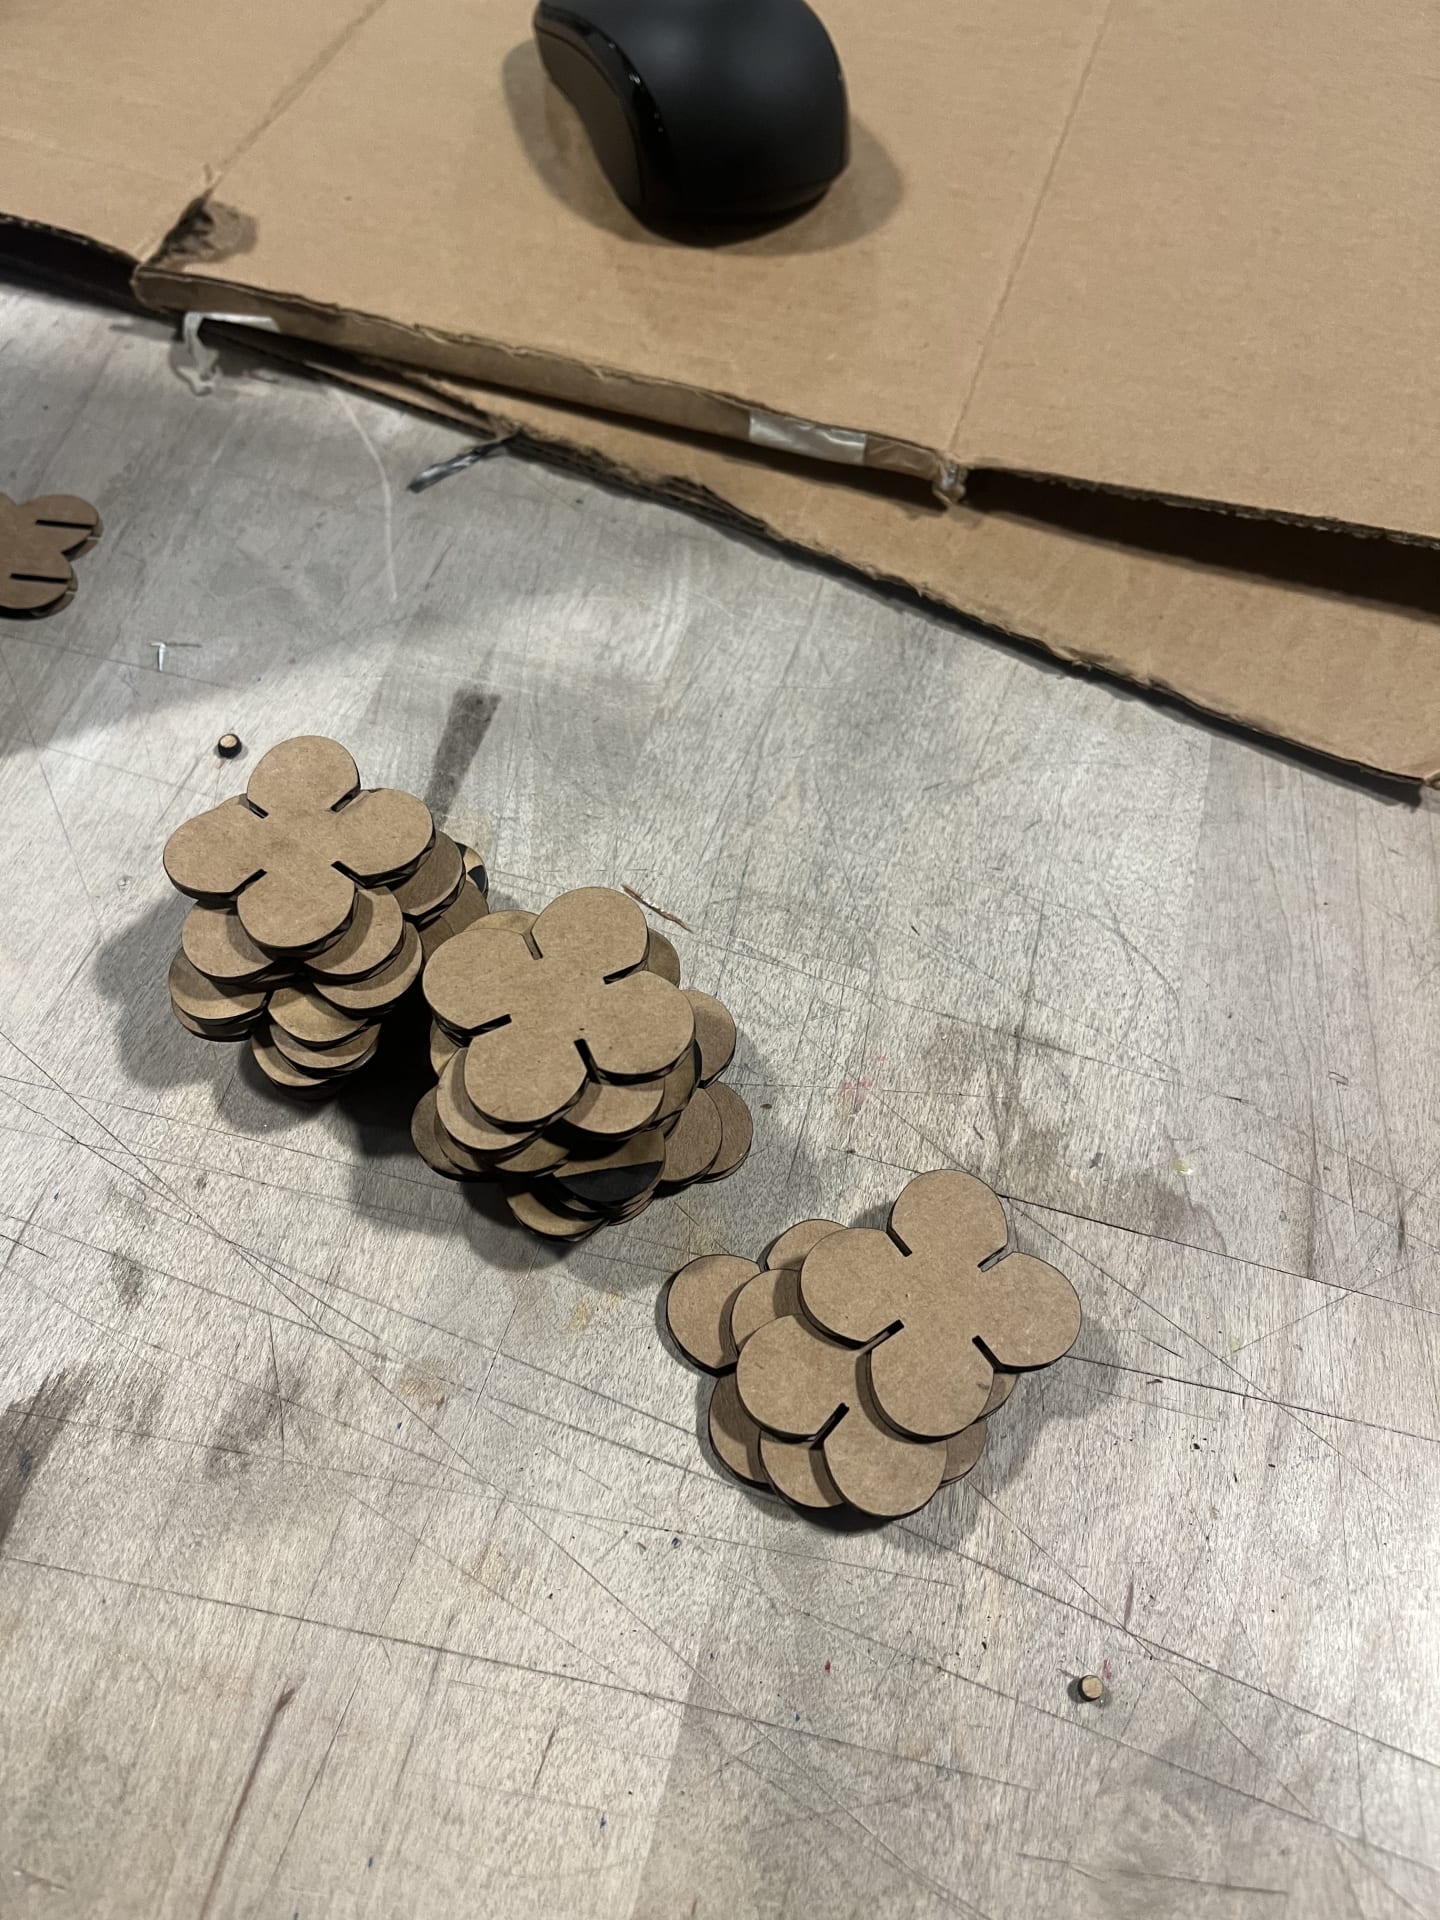
Shake test
Overall, a success!